Macromedia CONTRIBUTE 3
Instructions
- Prof. G. Jones
The advantage of learning Contribute (Ver. 3) over using HTML code is speed and consistency. The advantage of Contribute over competing user-friendly HTML editors is, again, speed and consistency. And add sophistication. Contribute 3 could be used in a small business—it even has a built-in “PayPal” button. Contribute allows one Web site administrator to give lower-level permissions to multiple site contributors. Finally, Contribute is the little brother to Macromedia’s Dreamweaver, the “industry-leading Web development tool.”
I will request that WCU IT establish “PAWS accounts for all students. Ideally, these accounts will have a default home page for each student. Your pre-established home page will serve as a temporary place-holder until you draft and upload to the server (“publish”) your own personal home page. A homepage is typically not more than one-screen high. From your homepage you will create hyperlinks to other Web pages that you create for this course—minimally, (a) a page of 15 or 20 links to professional organizations and/or resources in your major, and (b) your carefully edited resume, in HTML format.
For more on this assignment, see my “Assignments Described” link, as well as my page to resources describing basic Web page construction and style.
The steps to creating a Web site in Contribute are as follows:
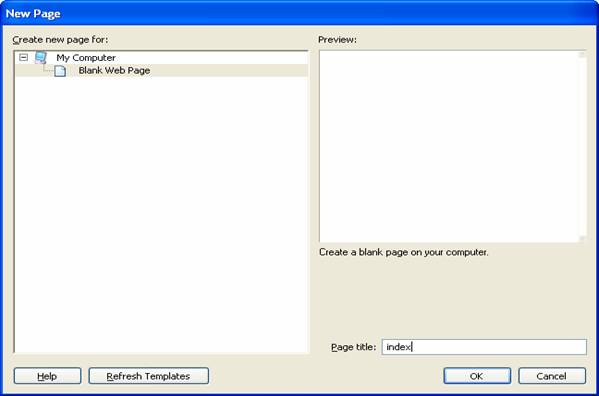
1. Open Contribute and create a blank page. Page title = index. OK.
2. You will see this message. Click OK.

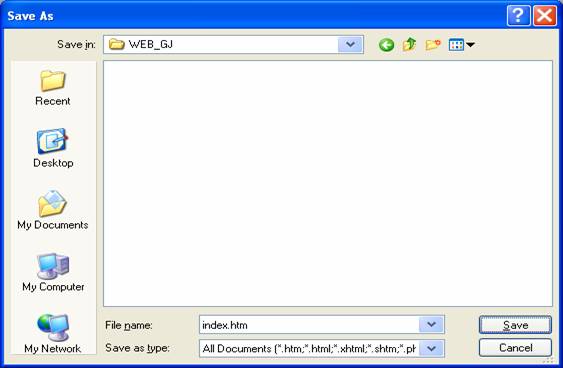
3. Create a subfolder from the root (top) directory of C (not My Computer or My Documents). Use the drop-down box to navigate up to the root of ‘C’ -- click on the New Folder icon to create your folder.
4. I created a new folder (sub-directory) called “WEB_GJ”
5. Create draft of home page
(Remember you will be linking to your Resume page and your Professional Links page, among other possibilities)

6. Check to confirm that you have a default home page (established by IT when it first set up your PAWS account). Go to your Web address:
http://paws.wcu.edu/ab12345 (where ab12345 stands in for your vax account [email] ID)
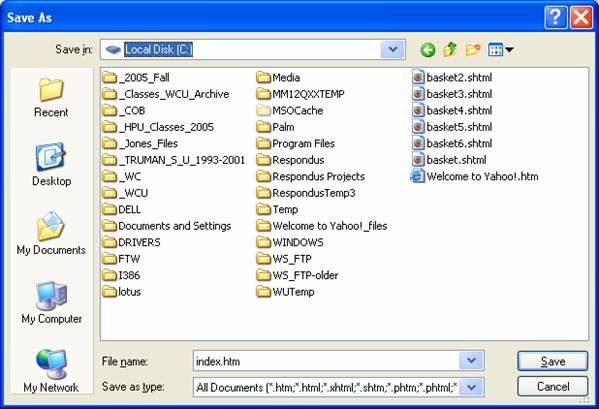
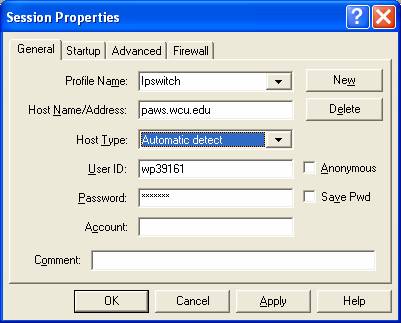
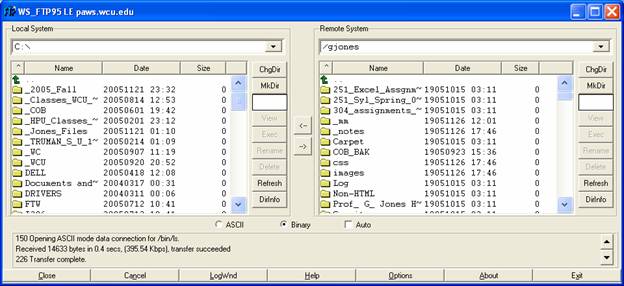
IF a page comes up—say, a welcome page—then skip to step 7. If nothing comes up then there is no default home page (index page) on your new PAWS account. You will need to use the old WS_FTP program to upload your rough draft home page (index.htm) up to the server. Do this as soon as you have saved a very rough home page – before you spend even five minutes on it. Your initial password will be set up by IT and given to you by me (probably “changeme” or “letmein”). Using WS_FTP, connect to your PAWS account as shown here:
Now find your recently saved index.htm file on your local drive (left window). Double-click the green arrow if you need to go up a directory (or two). When you find your index.htm file, double-click it (or highlight it and click the right arrow in the middle column) to send it from your local drive up to the server. This is how you use FTP (File Transfer Protocol) to upload a file).
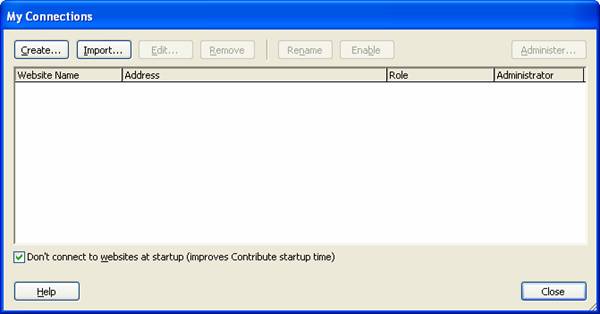
7. Now that you have confirmed that you have some kind of functioning home page in your PAWS account, go back into Contribute and EDIT, MY CONNECTIONS
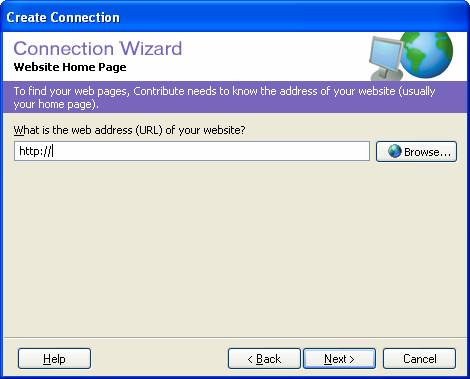
8. CREATE, then click NEXT
And now fill in the URL (Uniform Resource Locator) of your Website’s home page (described above). The directions were, you recall, that you name your home page file “index” (Contribute adds the “.htm” extension automatically)
9. For example
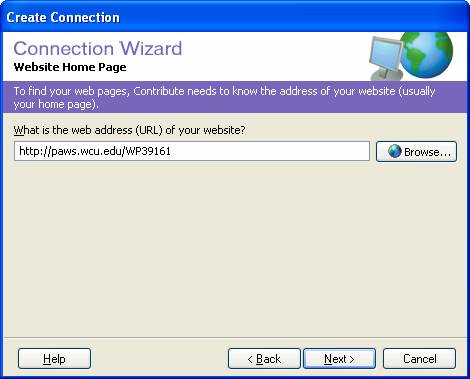
CLICK NEXT, SELECT FTP FROM THE DROP-DOWN BOX
10. Fill out the next dialog box as follows, using your own account ID, of course:
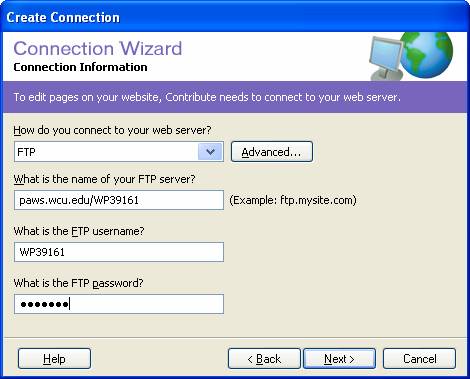
11. The following box should pop up, which you fill in (using your own appropriate information, of course):
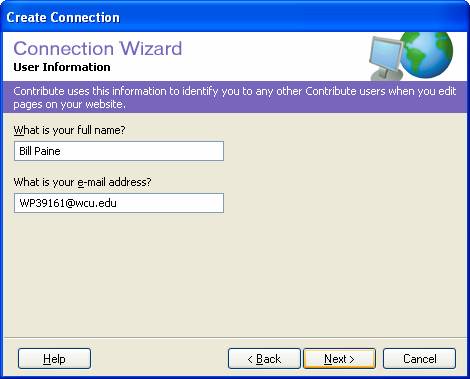
NEXT
12. Looking good:
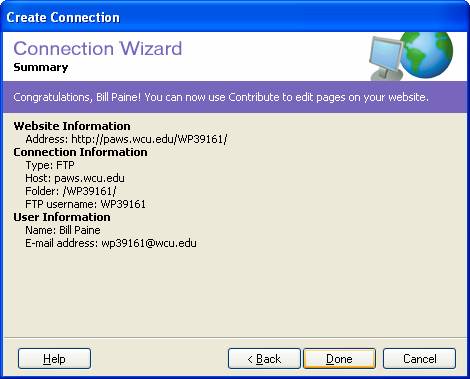
DONE
13. RENAME CONNECTION (Using your name, for example)
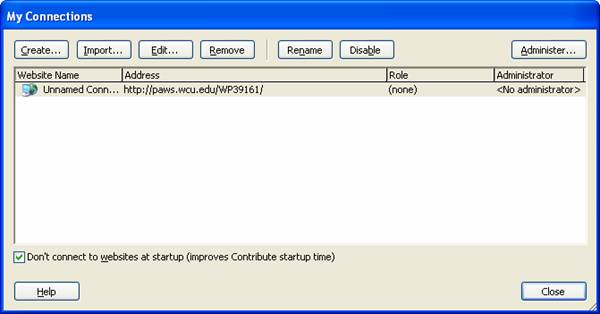
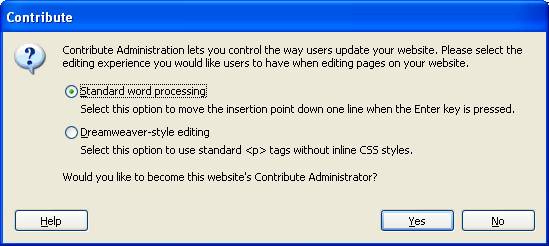
14a. ADMINISTER. Click the Administer button, select “Standard word processing” -- at least for now.
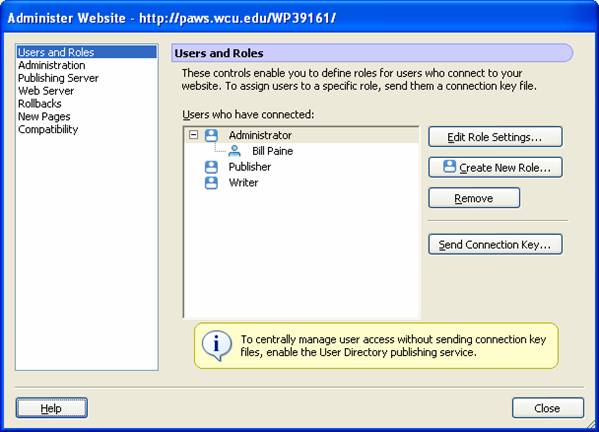
14b. (Cont.) Here is where, if you were a small business owner, you could give some of your employees limited page writing/publishing authority. Your box should look like this, with your name. You are making yourself the ADMINSTRATOR. Click Close.
CLOSE
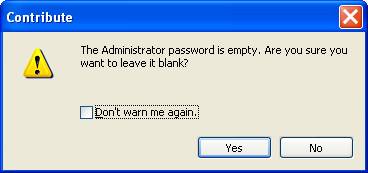
14c. No need to give yourself a password at this point. Click ‘yes’ (password is empty).
YES
15. STILL IN CONTRIBUTE: Here is a sample screen once the connection is successfully made. The revised draft of the home page (index) has been “published” (uploaded). The student has begun editing a new page, “Personal_Links.” You can tell by the yellow starburst that this file has not been uploaded yet.

16. To create external links: type in your link-to-be, highlight it, click on the LINK icon, and select “Browse to Web Page.” Simply insert the correct, full, http-address in the line in the dialog box. We did this in class. I still think it fastest to have a separate browser window open, and cut-and-paste from there.
17. To create internal links (say, from Index to Professional_Links, and back the other way), it’s a good idea to have all the pages you are working on show in the left column in Contribute. Create new pages as you go, or, if already published, go to the Browser link (upper left), navigate to the page you want to work on, then click “Edit Page.” If you are creating a link from your home page to your resume page, make sure both pages show in the left column under “Pages,” then highlight the word “resume” on your home page, click on the LINK icon, then Drafts and Recent Pages, select Resume page. You can also link directly to pages already up on your browser. (And here is also a convenient place to create new pages.)
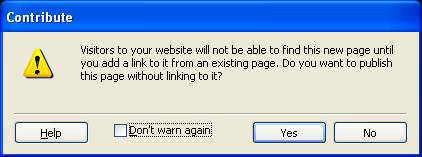
18. As you will see, when you go to upload (Publish) a page, Contribute prefers that every page be linked to some existing page. If not, you will get a friendly warning:
Now it is up to you to familiarize yourself with this program and its power. With these instructions as a guide, in two hours you can develop a fairly strong comfort level with this program.